
Come make soaps with me!
Hello Everyone so today I am going to continue with my "Homemade May Series" and show you all how I like to make my home-made soaps!
I really enjoy making soaps and like making them for myself or for friends and family and the way I make them is really quick, easy to follow and very simple. I am not in any way a professional soap maker! This is just something I enjoy doing in my spare time and my method is just the way that I've learnt so, I thought I would show you guys today so you can give it a go yourselves!
What you will need...

A lot of these items are available from shops that specialise in arts & crafts- I've purchased the majority of the products that I'm using today from Hobbycraft- so I will pop a link next to anything I've mentioned!
1. A Clear Soap Base- these soap bases come in huge blocks which you will need to cut up and melt. The method I like to use is the "Melt & Pour" method which is very much self-explanatory and involves heating up the soap base and pouring it into moulds. The soap bases can come in different colours and scents but I like to just use the clear standards bases so I can add my own touches!

2. Pipettes- you are going to need some form of measuring equipment to use to measure out your ingredients to add your base.
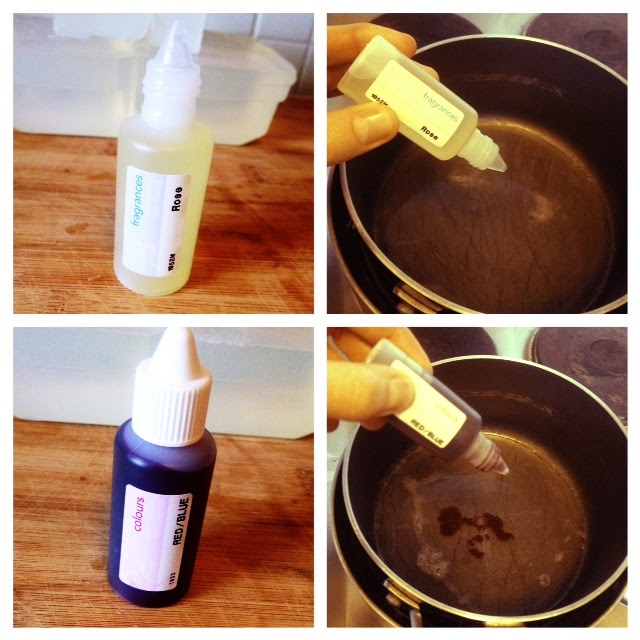
3. Fragrances- you can add any scent you like to your soaps, Hobbycraft offer a huge range of scents from floral to fruity so pick which ever takes your fancy to make your soap perfect for you.

4. Colour- adding colour to the mix can transform the appearance significantly- I've chosen a red and blue colour supplement to add to my mix.
.JPG)
5. Moulds- once the mix is ready you will need to pour the liquid into a mould- I prefer to you use the silicone moulds as they are easy to push the soap out once chilled, there are lots of cute shapes to choose from, I have lots, some festive, some like little cupcake cases and others that are the shape of roses.

6. X2 Saucepans and access to a Hob- you will need two saucepans, one which fits inside the other to melt your compound in.
Hints & Tips- you can enhance your soaps appearance and purpose by adding in some natural
.JPG)
1. Melting the Soap Compound- get both saucepans out- one of which is slightly smaller and fits into the other. The smaller saucepan is going to be used to melt the soap base in- never melt the compound over direct heat! Fill the base saucepan with water (approx 2 pints) and heat over the hob- don't exceed over 75degrees or allow the water to boil over into the second pan.
- Fit the second saucepan inside of the other (which is filled with hot water) and cut off a chunk of the soap compound, place the cut pieces into the smaller pan.
- Stirring occasionally until the pieces are melted then remove directly off the heat.
.JPG)
.JPG)
.JPG)
3. Using the Moulds- next you are going to need to pour the mix into the moulds.
- Gently pour the liquid into each mould just below the brim.
- Leave to cool for 30 minutes and place into the fridge ensuring to cover with cling film to avoid contamination with food.

4. Removing Soaps from the Moulds- using the work surface, place the mould upside down and give them a sharp tap to loosen the soaps.
5. Added Ideas - if your soaps turn out well- why not make your soaps into little gifts and place them into pretty decorative jars, baskets or bags?
Here's how mine turned out!

Thanks for reading-xx
No comments:
Post a Comment